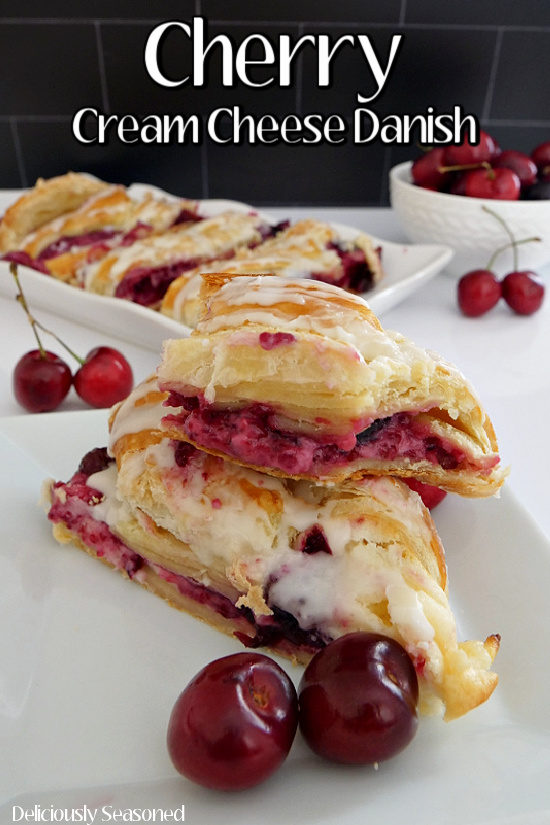
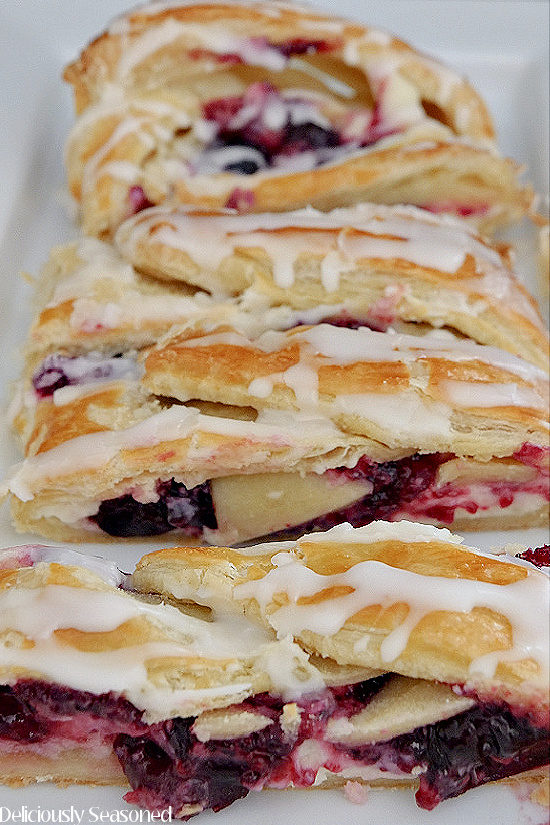
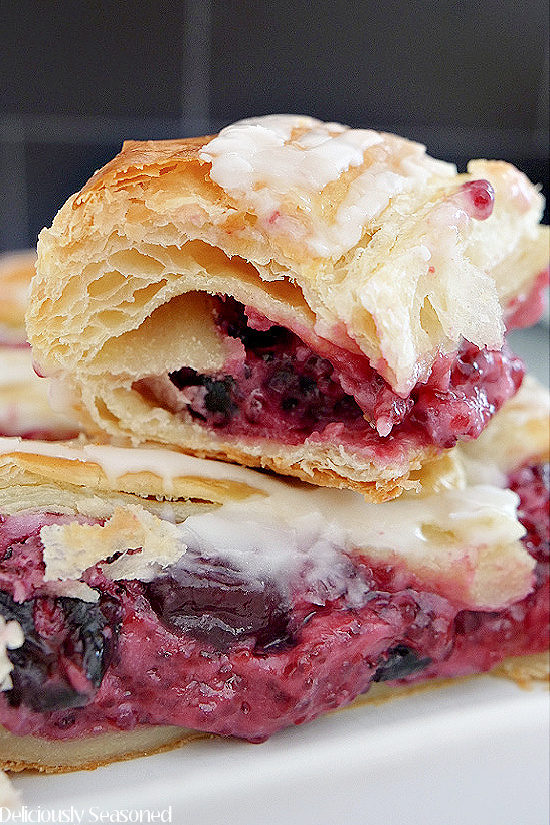
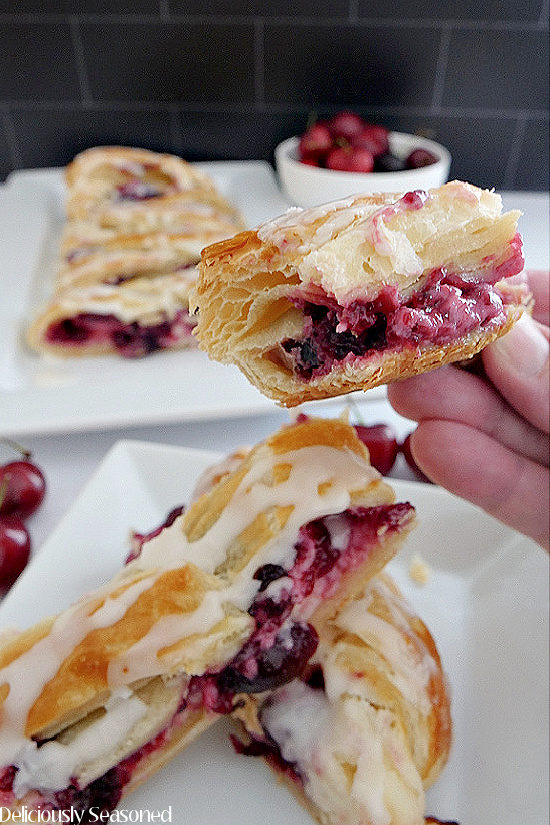
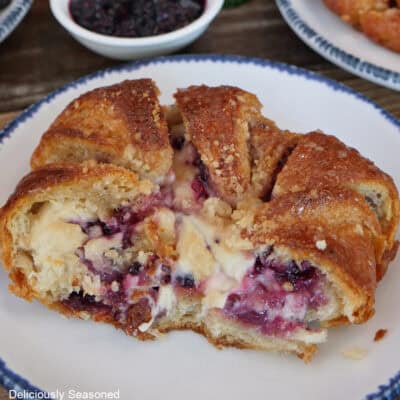
This Cherry Cream Cheese Danish is a delicious summer dessert recipe that is easy to make, filled with a smooth cream cheese mixture and a sweet fresh cherry filling and then finished with a lovely glaze. It’s a delectable dessert that comes together quickly and satisfies even the largest sweet tooth!
I love danish and other pastries. Their flaky, buttery crusts and rich, sweet fillings have always satisfied my sweet cravings. So of course, when I started cooking, one of the first things I did was seek out pastry recipes. Wow. They can be complicated. I’m no stranger to involved recipes, and I don’t really mind them. BUT… I don’t want to have to slave away all day in the kitchen every time I want a homemade pastry.
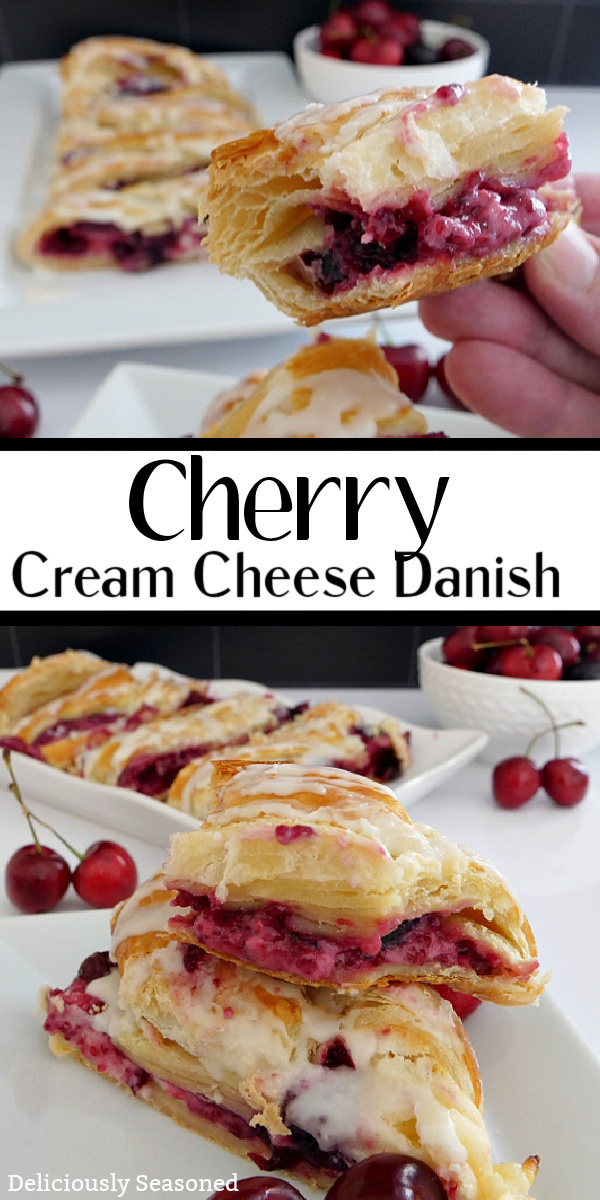
Cherry Cream Cheese Danish
I love making homemade recipes as much as the next cook, but there are times when it just makes more sense to go with a semi-homemade approach. That’s the case with this delicious Cherry Cream Cheese Danish. Rather than slaving for hours in the kitchen, combining layers of dough with butter and doing all the other minutia that goes into making homemade puff pastry, I simply buy it from the store. It cuts of tons of time, and really, it’s just as good.
As for the rest of this delicious cream cheese and cherry dream… Well, it’s all homemade from there. Homemade and holy cow is it easy! Both the cream cheese mixture and the cherry filling only take a few ingredients to make, but when your guests taste it, they’ll think it took hours of prep. This combination of amazing flavor and ease of preparation makes this cherry cream cheese danish perfect for everything from weeknight desserts and afternoon snacks to a beautiful addition to potluck and holiday tables.
I make this fast, easy danish recipe at least once a month, sometimes far more than that if I’ve been really having an itch for pastry deliciousness. It’s just so delicious and easy, I can never see a reason NOT to make it whenever the mood strikes me.
Tips
This is just about the simplest pastry recipe you’ll ever make. However, as with many simple things, there are little things to know that help translate the recipe to the table in the way you expect. These are simple tips that will really help you get the most out of this recipe.
Adding the Filling
Be sure to let the cherry filling cool completely before adding it on top of the cream cheese filling. This is an important step. If you had the cherry filling while it’s hot, the cream cheese mixture will immediately begin to melt and spread, making it impossible to braid the top of the danish.
Cutting the Puff Pastry
When cutting the puff pastry for braiding at the end of the recipe, be sure not to cut too close to the filling. If you cut too closely, the filling will dribble out as the pastry cooks. I find it easiest to put the filling on the prepared pastry that I’ve rolled out and then use that as a guide for how long to cut the edge pieces.
Braiding the Top of the Danish
When it’s time to braid the puff pastry strips to complete this cherry cream cheese danish, be sure to wet the ends with a bit of water. This ensures that the pastry dough will stick and remain in place as the pastry bakes up.
Variations
This recipe is the perfect base for making any sort of easy fruit danish you’d ever want to try. The variations are only limited by your imagination. Simply use the cream cheese mix recipe and the store-bought puff pastry as described in the recipe, but switch up the fruity filling portion. Almost any kind of fruit will work for this filling. Some great options to consider include:
- Apples
- Apricots
- Blackberries
- Blueberries
- Peaches
- Raspberries
- Strawberries
The above choices are my personal favorites because they’re some of the most classic danish flavors. But if you’re feeling super adventurous, you can try anything you want.
P.S. If you try something really out there, I’d love to hear about it!
Serving Cherry Cream Cheese Danish
As with any good pastry, all you need to serve this is a glass of milk or a cup of coffee. It already has a rich, sweet filling and a lovely vanilla glaze, so there’s no need to top it with anything. It’s one of those sweet recipes that stands up without any sort of topping at all.
I love to serve this simple danish as a sweet breakfast, afternoon snack, dessert at dinner time and even at potlucks and holiday get-togethers. Of course, if I bring them to potlucks, I’ll make three of four of them because they go so fast!
Storing the Danish
You can store this cherry cream cheese danish in the refrigerator in an air-tight container fro three to four days. However, be absolutely sure that you use an AIR-TIGHT container. When pastries are refrigerated without a tight seal, their quality is drastically reduced. To serve, simply heat your danish slices up in the microwave and enjoy!
Cherry Cream Cheese Danish – The Pastry You’ve Always Needed
You just didn’t know it. And here’s why. It’s SO ridiculously easy. That’s in addition to being absolutely delicious. This recipe comes together so quickly, and it tastes just like you made every single part of it from scratch. With a combination like that, there’s no reason not to make it again and again and again. And I guarantee that’s exactly what will happen if you try it just one time. Easy plus delicious equals the best pastry recipe you’ll ever make. Give it a try!
Cherry Cream Cheese Danish Ingredients
- Fresh cherries
- Sugar
- Lemon juice
- Cornstarch
- Water
- Cream cheese
- Vanilla
- Powdered sugar
- Milk or heavy cream
- Egg
- Puff pastry sheets
How to Make Cherry Cream Cheese Danish
Step-by-Step Instructions
Step 1 – Prep
Preheat oven to 375° and line a baking sheet with parchment paper. Set aside.
Step 2 – For the Cherry Filling
In a small saucepan, over low heat, add cherries, sugar, lemon juice, water, and cornstarch until sugar has melted and sauce has thickened. Remove from heat and let cool.
Step 3 – For the Cream Cheese Filling
In a medium bowl, beat cream cheese until smooth and then add in sugar, lemon juice, and vanilla. Beat until well combined.
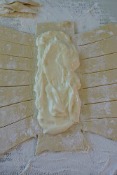
Step 4 – Assembling the Danish
On a lightly floured surface, unroll a pastry and roll dough to seal the seams. Place dough on prepared baking sheet and add half of the cream cheese mixture down the center.
Step 5 – Folding the Danish
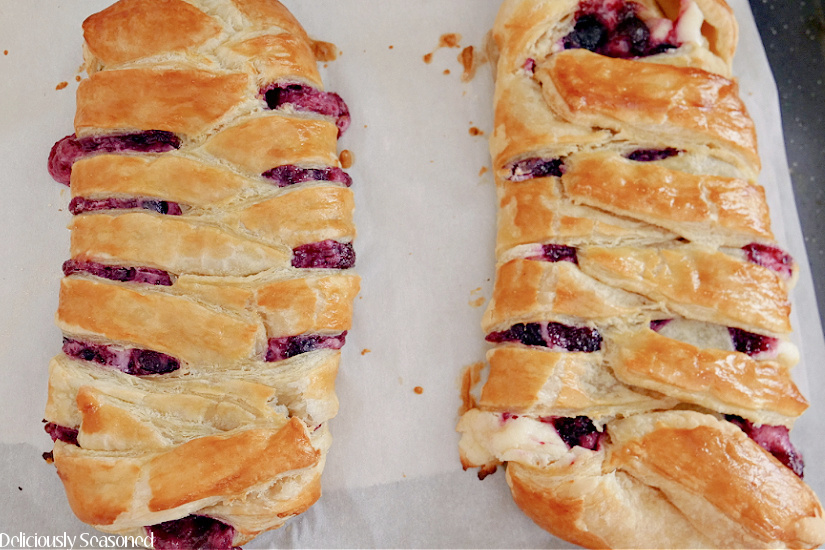
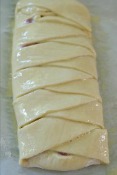
Cut two slits at each end of the pastry, about 1 inch long and fold over the top of the filling and secure. Cut off the top and bottom side pieces at an angle and continue to make the cuts in the pastry.
Step 6 – Adding Cherry Filling
Once cherry filling has cooled, add half of the cherry filling on top of the cream cheese.
Step 7 – Folding the Pastry
Once the ends are secured over the filling, fold each piece over each other like a braid and then secure.
Step 8 – Baking the Danish
Brush with egg wash and bake for 25-30 minutes.
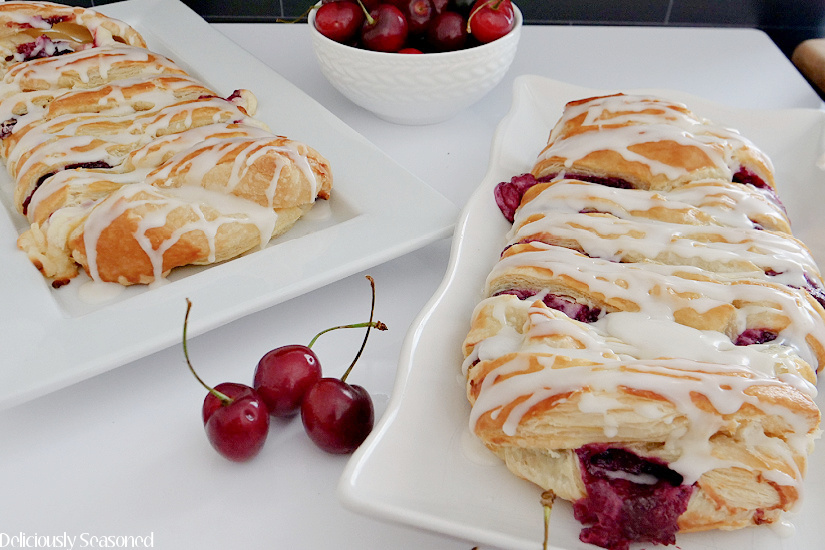
Step 9 – Making the Glaze
In a small bowl, mix together powdered sugar, vanilla, and heavy cream until blended. When Danish is pulled form oven, let cool, and then drizzle with glaze. Slice and enjoy.
Try This Delicious Pastry Today

Here are a few more dessert recipes that you might enjoy:
And here is a delicious Easy Cherry Cobbler from Great Grub, Delicious Treats we think you’ll enjoy too!

Cherry Cream Cheese Danish
Ingredients
For The Cherry Filling
- 2 cup fresh cherries, rinsed, pits removed, cut in half
- ⅓ cup sugar
- 1 tablespoon lemon juice
- 2 tablespoon water
- 1-2 tablespoon corn starch, start with one tablespoon
For The Cream Cheese Filling
- 8 ounce cream cheese
- ⅓ cup sugar
- 1 teaspoon lemon juice
- 1 teaspoon vanilla
For The Glaze
- 1 cup powdered sugar
- ½ teaspoon vanilla
- 2 tablespoon heavy cream or milk
For The Puff Pastry
- 1 box puff pastry sheets, (2 sheets) room temperature
- 1 egg
- 1 tablespoon water
Instructions
- Preheat oven to 375° and line a baking sheet with parchment paper. Set aside.
For The Cherry Filling
- In a small saucepan, add cherries, sugar, lemon juice, water and cornstarch. Stir;
- Heat over low heat until sugar has melted and sauce has thickened.
- Remove from heat and let cool
For The Cream Cheese Filling
- In a medium bowl, beat cream cheese until smooth, about 2 minutes.
- Add sugar, lemon juice and vanilla. Beat until well combined.
Assembling The Danish
- Unroll puff pastries and on a lightly floured surface, gently roll dough to seal the seams.
- Place dough on prepared baking sheet and add ½ of the cream cheese mixture down the center of the pastry leaving 1½ inch free from filling at both ends.
- Cut two slits at each end of the pastry about 1 inch long and fold over the top of the filling and secure to prevent mixture from leaking out.Next cut off the top and bottom side pieces at an angle (see photo) and continue to make cuts into the pastry along each side making sure not to cut too close to the filling.

- Once cherry filling has cooled, add ½ of the cherry filling on top of the cream cheese. Repeat steps for the second puff pastry sheet.
- Once the ends have been secured over the filling, start folding each piece over each other like a braid and secure.
- Brush with egg wash and bake for 25-30 minutes.
For The Glaze
- In a small bowl, add powdered sugar, vanilla and heavy cream. Stir until blended.
- Once Danish is pulled from the oven and has cooled a bit, drizzle glaze over the top of both pastries, slice and enjoy!
Video
Here are two pictures that are the perfect size to pin to your favorite Pinterest boards.


Confused as to how many this makes. 8 servings , picture shows two pastry’s but recipes only states making one until you get to spreading on the filling. Are you suppose to split the pastry into two ? Says to bring to room temperature and roll out? Is the box of pastry suppose to be divided into two?
Hi Peggy, the puff pastry box contains two. The directions are clarified so they are easier to understand. Thank you so much. We based the serving size on 2 slices per serving with a total of 8 servings. 🙂