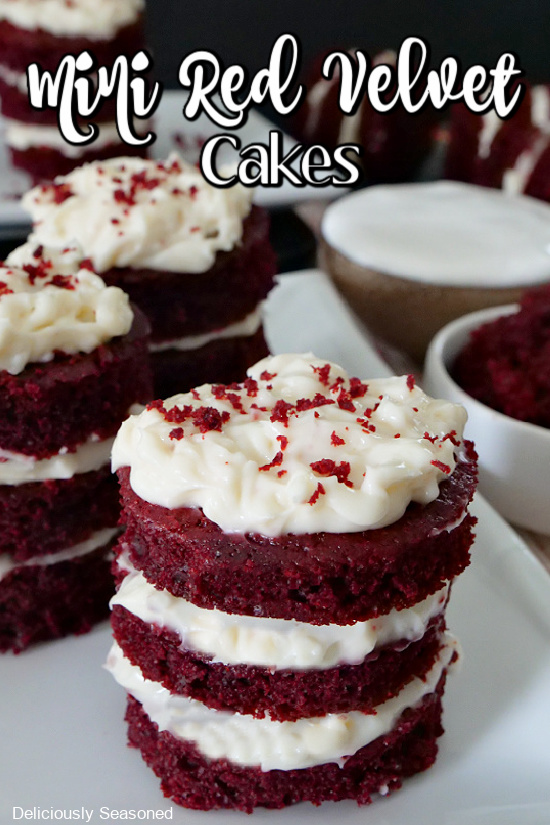
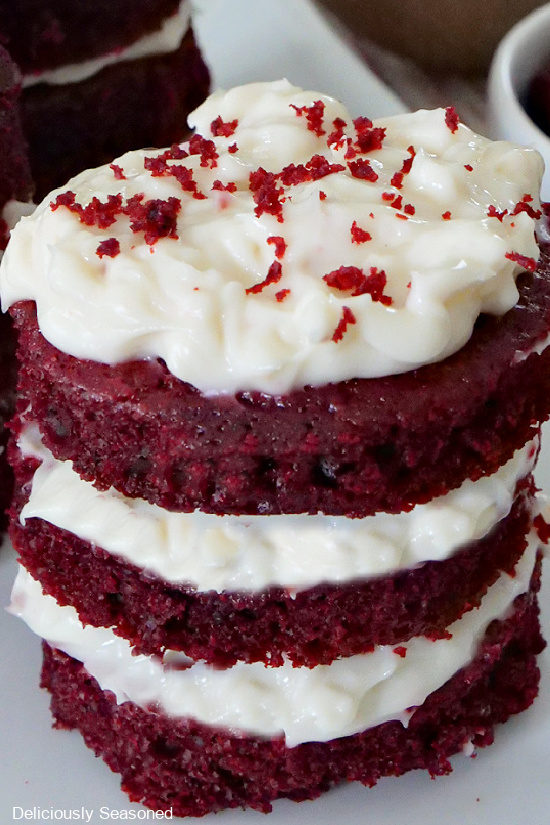
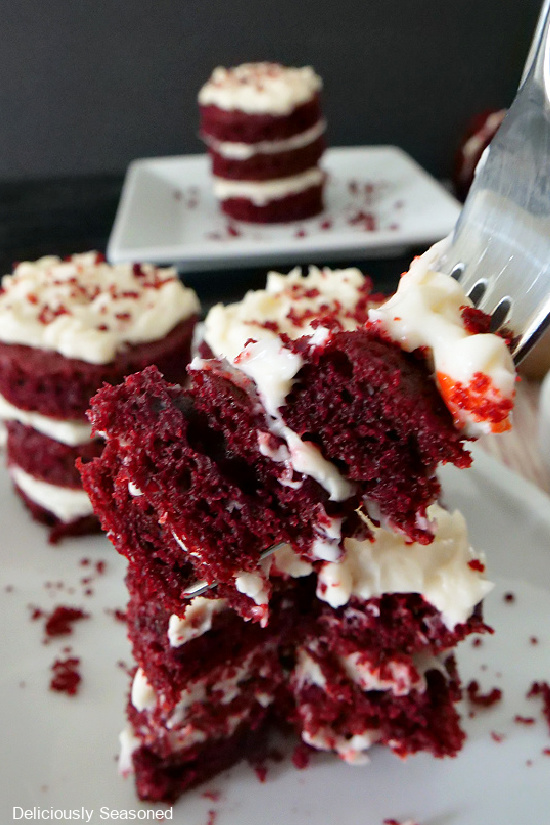
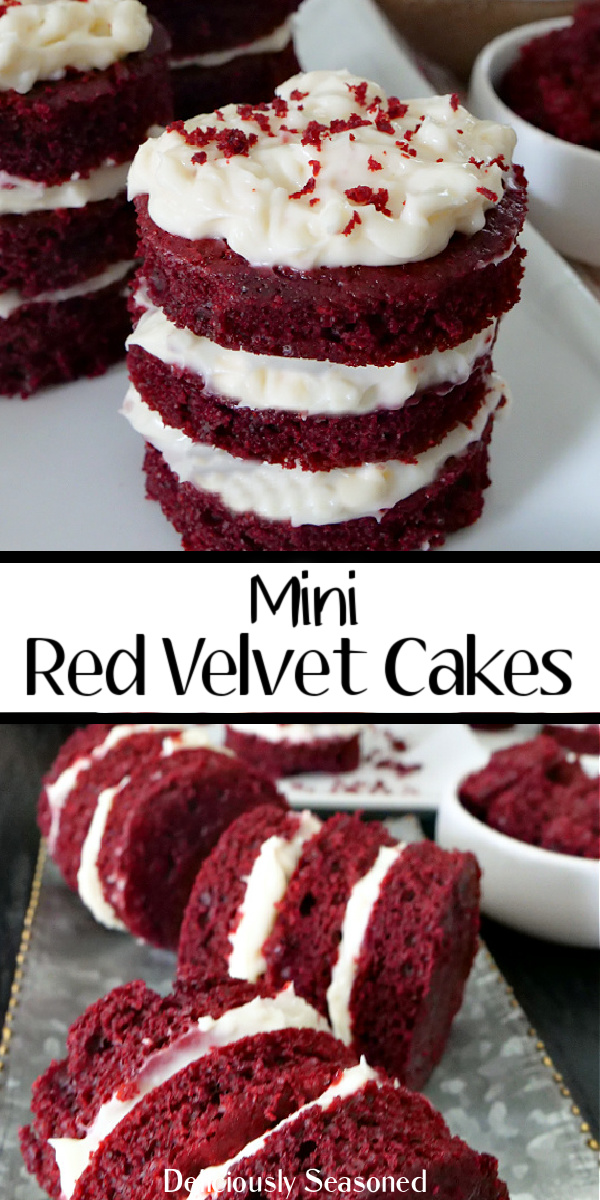
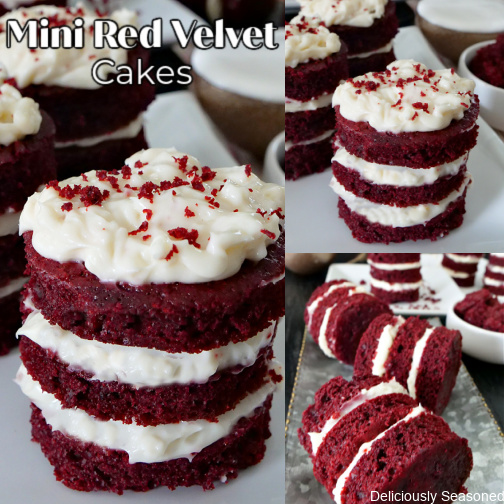
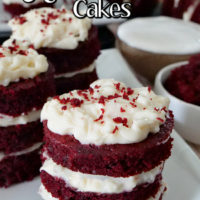
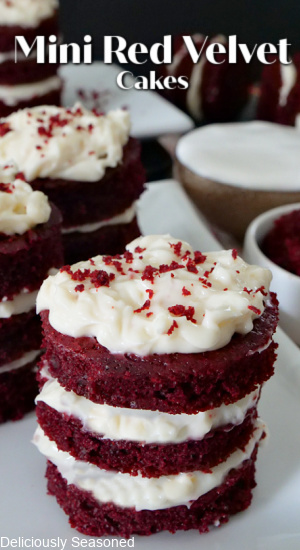
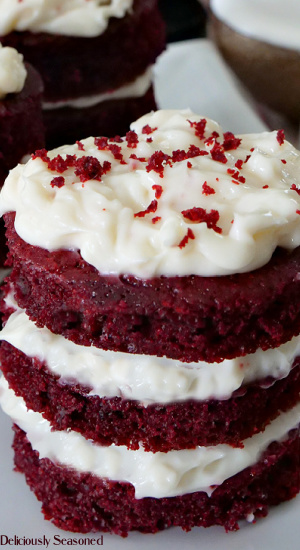
Mini red velvet cakes are a fun way to serve up the classic red velvet cake we all love in a single-serve portion that is as cute as it is delicious. These little three-layer cakes feature the classic red velvet cake and cream cheese frosting combo we all love so much in an adorable little package that is so cute and so good!
If there’s one thing my family loves, it’s cake. I make all kinds of sweet treats for weeknight desserts and special occasions, but what really gets us excited around here is cake. Sheet cakes, layer cakes, dump cakes, poke cakes, cupcakes – we love them all. In fact, if the word “cake” is involved in any way, you can bet that my family will be on board for it.
For most family desserts, I’ll make something like a sheet, poke, or dump cake. They’re just so fast, and since they’re a dessert that I’ll be making AFTER I’ve already made the main meal, I love their simplicity. If I want to get a little fancier but still keep things simple, I’ll make mini cakes.
This mini red velvet cakes recipe makes a great dessert for weeknights because they are quite easy to make. They’re also a great sweet treat for the holidays or potlucks because they look just fancy enough to work on a holiday table, especially with their rich red color. The great thing about them, however, is that they’re actually very easy to make.
Origin of Mini Cakes
These red velvet cakes are a super simplified version of the classic petit fours. Simplified mini cakes like this one are easier variations of these classic French little layer cakes. Petit fours were created about 130 years ago in France. These tiny little layer cakes were and are much, much fancier than my mini red velvet cakes. In fact, petit fours are tiny little fully frosted layer cakes.
In the 19th century, gas and electric ovens weren’t a thing. French bakers had one way to cook their baked goods – huge brick or stone ovens that were almost always coal-fired. These ovens had two “settings” if you will. These were when the fire was most intense and when the fire was dying out. The former was called grand four, which translates to big over. The latter was called petit fours, which translates to small oven.
The classic French mini cake got its name from that heat level. The dying fire created a temperature that was perfect for baking cookies, individual pastries, and of course, mini cakes. That’s how the mini cake was born.
I’ve translated that decadent, and very involved, cake idea into these easy to make min red velvet cakes. They have all the sensibilities of petit fours without all the hassle.
Mini Red Velvet Cakes are Always the Perfect Idea
Like I said, I’ll make these little layer cakes for family desserts whenever I or someone in my family gets a craving because they’re actually very easy to make. I also love to bake up a big batch of these cakes for potlucks or holiday get-togethers, especially Christmas.
Cake is always welcome for any occasion, and with such an easy recipe that looks so fancy – and adorable, I might add – it’s become one of my go-to’s when I need to bring a special dish to a get-together. These mini red velvet cakes always impress everyone who eats them, and no one realizes how easy it is for me to whip out a big batch of them. Everyone wins!
Variations
While this recipe is for the classic red velvet and cream cheese frosting cake, you can make min cakes in any variation you choose. If you have a small biscuit cutter to make the mini cake rounds, the sky’s the limit when it comes to these little cakes.
Change the Cake Mix
The real star of this recipe is the presentation, so you can pick any cake mix you like. Literally, any cake mix will work. Chose from classics like yellow, white, chocolate, or vanilla to some of the more creative mixes out there like funfetti. It’s so much fun to change out the cake mix to fit the occasion. The funfetti I just mentioned is great for birthdays or Easter because of its fun colors. The flavor and color of strawberry cake mix are perfect for Valentine’s Day. This recipe is so versatile that you can make different mini cakes for any and every occasion!
Change the Frosting
Whether you stick with red velvet cake or try a different mix, you can get just as creative with the frosting as you can with the mix. Mix and match your cake mix and frosting choices to create all kinds of tasty combinations that you can customize for any occasion.
Change the Shape
You don’t have to stick with round shapes if you don’t want to. You can find specially-shaped cake cutters that let you cut out cakes into all kinds of shapes. Get several different kinds, and you’ll be able to make all kinds of fun layered cake shapes.
Tips for Making Mini Red Velvet Cakes
This is a very straightforward recipe with a short ingredient list and easy prep. That being said, there are a few tips that will make your life easier and your cake prettier and tastier when it’s all said and done.
Cool the Cake Completely Before Frosting
It can be so tempting to try frosting your cakes before they’re fully cooled. I get it. Life is fast-paced, especially these days. What does it matter if the cake is still a touch warm? Actually, it matters more than you think.
If you try frosting the cakes while they’re still warm, the frosting will actually melt a bit, making everything harder to do, and it might not even work at all.
Make it an Assembly Line
If you want to save time and remove the temptation of frosting the cakes too soon, make them assembly-line style. Cook your cake and then cut out the shapes first. After that, being making the frosting. The cakes will cool while you make the frosting, and you won’t have to deal with the temptation of premature frosting.
Bypass the Sticky Mess
The frosting for these mini red velvet cakes calls for marshmallow fluff. If you’ve ever used fluff for any reason, you know that it’s both delicious and an absolutely HUGE mess at times. To bypass the mess, run hot water over your spoon before scooping out the fluff for the frosting. It will keep it from sticking to the spoon and making a stringy, sticky, sugary mess.
Serving Mini Red Velvet Cakes
All you need for these little delicious cakes is a plate and a fork. They are so delicious and so cute, they are the stars of their own show. For an afternoon snack, you can also pair this cake with a nice cup of coffee. I prefer black coffee as it really sets off the flavor of the cake, but that’s just me. Just don’t enjoy your cake with coffee too late in the day, unless you really don’t like sleeping.
Storing the Cakes
These delicious min red velvet cakes will keep for about 3 days in the refrigerator in an air-tight container. To serve them, simply let them set out on the counter covered until they reach room temperature. You could also do what I do at times, which is simply to eat them cold. They’re so good!
For longer storage, you can freeze these mini red velvet cakes for up to 3 months. The high-fat content of the cream cheese in the frosting means it will freeze quite well. In addition, most cake tends to freeze well, so you’ll have no problems here. To serve, simply thaw the cake out in the fridge. You can then serve it cold or at room temperature.
Try These Mini Red Velvet Cakes
Once you make these mini red velvet cakes, you’ll wonder where they’ve been all of your life. They’re so easy to make and so rich and moist, they’re always a crowd-pleaser. Whether you serve them up for a family dessert or as an addition to a potluck or holiday get-together, everyone who tries them will be begging for more.
Ingredients to Make Red Velvet Mini Cakes
- Red velvet cake mix
- Eggs
- Canola oil
- Water
- Whipped cream cheese
- Marshmallow fluff
- Powdered sugar
- Vanilla Extract
(Actual ingredients are listed in the recipe card below.)
How to Make Red Velvet Mini Cakes
Step 1: Prep
Preheat oven to 350 degrees and spray a jelly roll pan lightly with a non-stick spray. Prepare cake mix according to package directions.
Step 2: Baking the Cake
Pour cake batter into prepared jelly roll pan. Bake for 15 minutes or until toothpick inserted in center comes out clean.
Step 3: Making the Frosting
In a small bowl, mix cream cheese, marshmallow fluff, powdered sugar, and vanilla together until combined. Place in refrigerator until ready to use.
Step 4: Assembling the Cakes
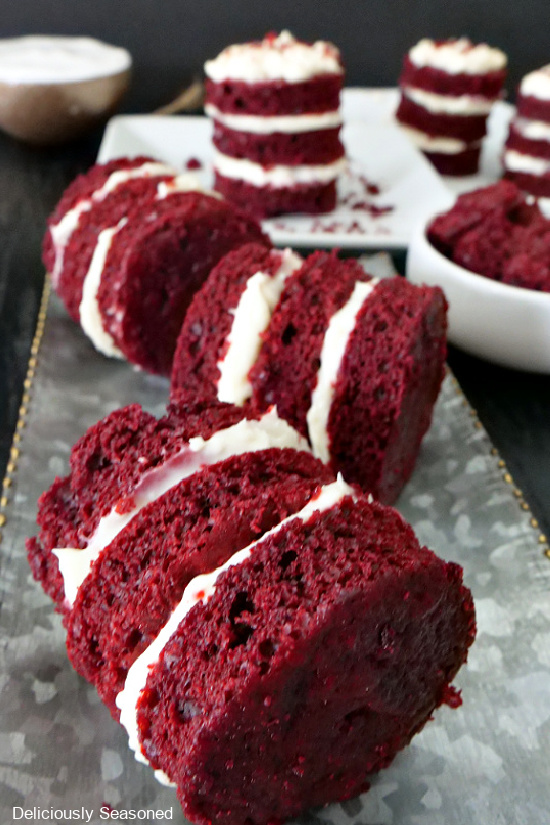
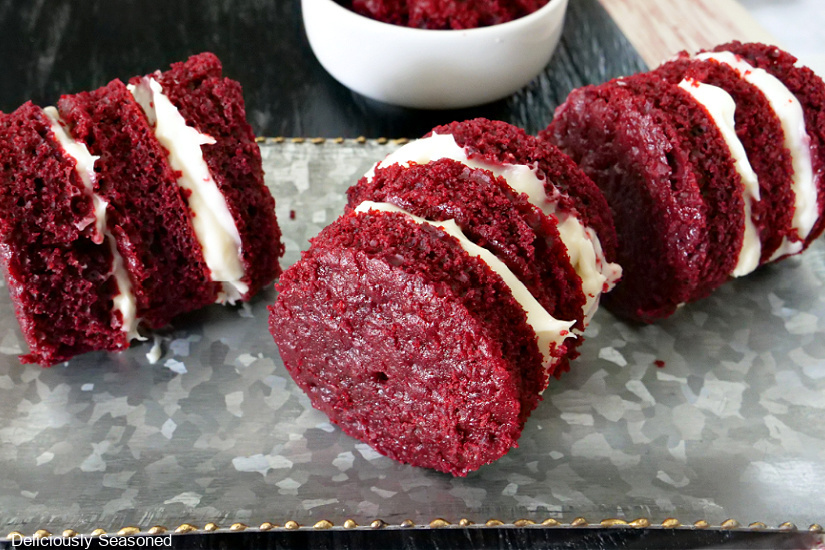
Each mini cake will have 3 pieces of cake.
Using a small biscuit cutter, cut circles in cake. Spread frosting mixture on top of one piece of cake, stack another piece of cake on top of the frosting, and add another layer of frosting. Top with the third piece of cake and add frosting and sprinkle cake crumbs on top of the frosting. Secure each stack of mini cakes with a kabob stick.
Try These Delicious Red Velvet Mini Cakes Today
Looking For More Delicious Cakes?
- Carrot Cake
- Butter Pecan Pound Cake
- Blueberry Streusel Cake
- And, Hot Fudge Cake from Great Grub, Delicious Treats
Red Velvet Mini Cakes
Ingredients
For the Cake
- 1 box red velvet cake mix
- 3 eggs, beaten
- ⅓ cup canola oil
- 1 cup water
For the Frosting
- 1 cup whipped cream cheese
- ½ cup marshmallow fluff
- 2 tbsp powdered sugar
- 1 tsp vanilla
Instructions
- Preheat oven to 350° and lightly spray a 15×10 inch jelly roll pan with a non stick spray.
- In a small bowl, mix cream cheese, marshmallow fluff, powdered sugar, and vanilla together until combined. Place in refrigerator until ready to use.
- Prepare cake mix according to package directions.
- Pour cake batter onto prepared jelly roll pan.
- Bake for 15 minutes or until toothpick inserted in center comes out clean. Cool completely.
- Using a small biscuit cutter, cut circles in cake
- Each mini cake will have 3 pieces of cake.
- Spread frosting mixture on the top of one piece of cake, stack another piece of cake on top of the frosting and add another layer of frosting. Top with the third piece of cake and add frosting and sprinkle cake crumbs on top of the frosting.
- Secure each stack of mini cakes with a kabob stick, if desired.
How adorable! I love the classic flavor with this fun, festive look.
Lovely recipe. The flavor is classic, and the presentation is absolutely perfect for the holidays.
These are as pretty as they are delicious! I can’t wait to serve them for our Christmas dinner!
What a fun, festive addition to any holiday table! I can see these for Valentine’s Day, as well.
These mini cakes are absolutely stunning! The deep red color is so vibrant, and you can never go wrong with a generous swirl of cream cheese frosting. They are the perfect elegant dessert for a holiday gathering!
I love red velvet cake and these mini cakes are perfect for the holidays! Love the individual servings…so delicious and moist!